
A current objective of XRi is to create immersive 360 video experiences that include video of the same classroom, but from multiple vantage points (i.e., cameras). We also want video annotation technology integrated to facilitate the viewer’s engagement in these experiences. However, when we began looking at 360 video, we started with one camera and little to no annotation technology. In this blog post, I will share some of the basic lessons learned for recording and creating a 360 video for use in training future teachers, or other professionals. Specifically, I’ll discuss the process of recording a 360 video (using the case of an elementary classroom), editing it into a shareable format, and posting it on YouTube to share with others. This isn’t a scholarly article, but rather a summary of hard lessons learned through trial, error, and success.
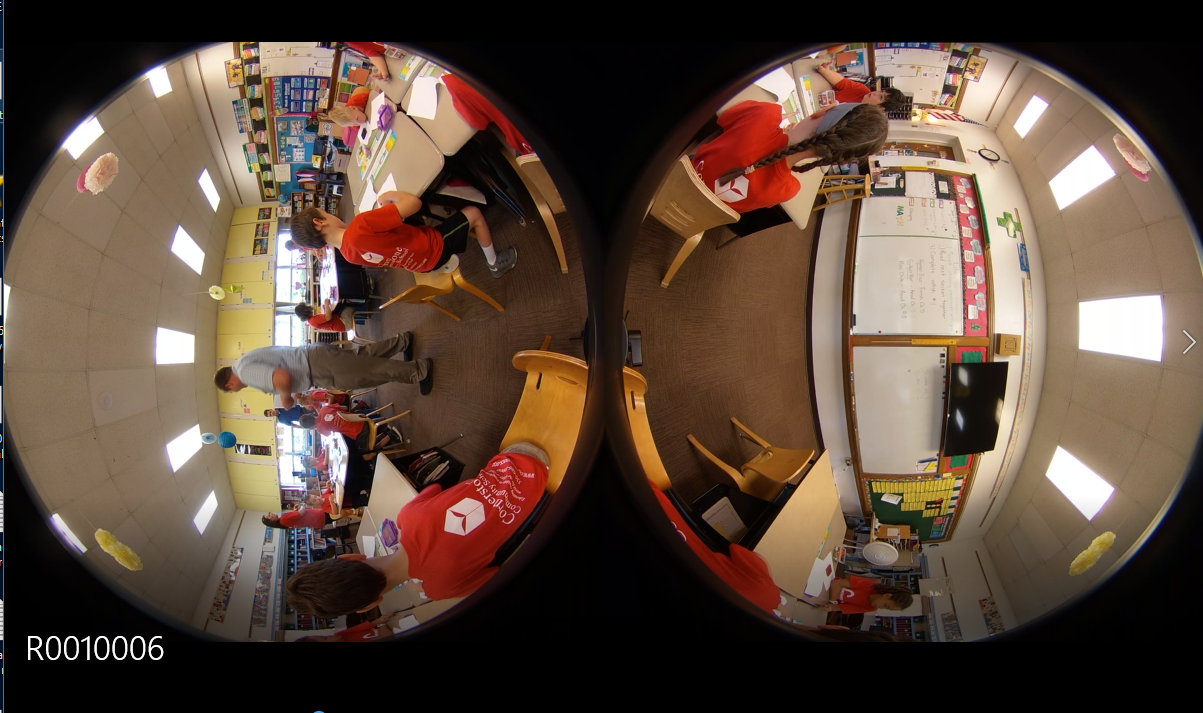
First, it’s helpful to know the overall process of recording, editing, and sharing a 360 video before getting into particulars. Most 360 video cameras have two camera lenses. These are typically ‘fish eye” lenses and will create a video that plays like below:
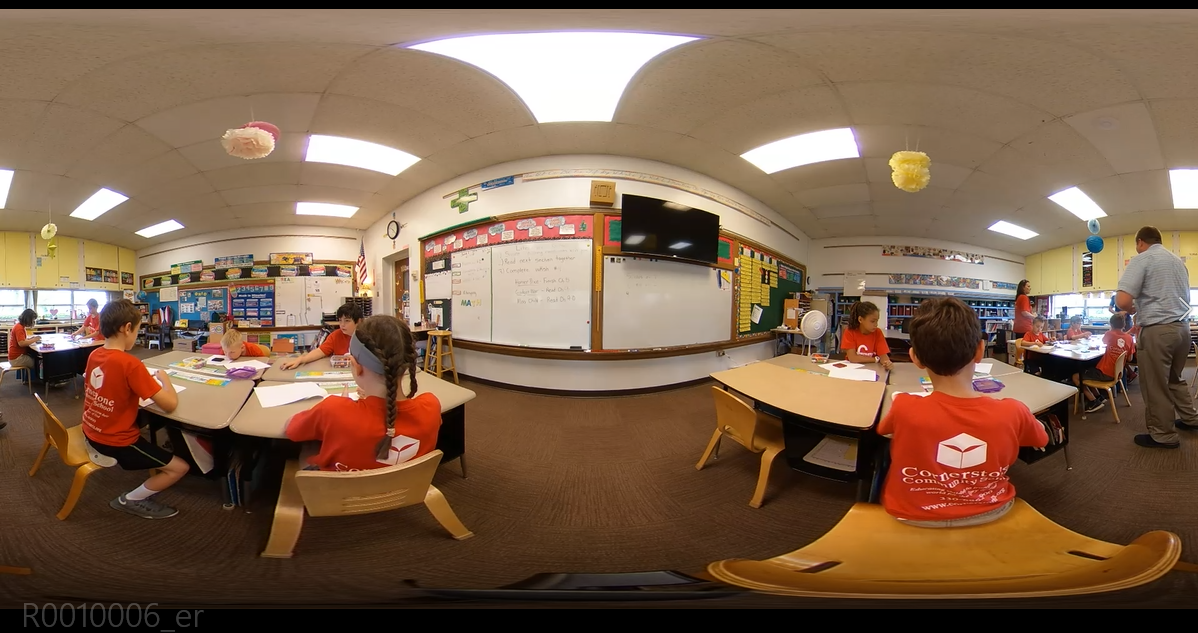
In order to create a “spherical” video, this raw 360 video needs to be stitched. Most cameras come with free stitching software. Once you have stitched the video, it might look like the below image in some media players:
You may need to download a compatible player (VLC player does a good job with 360 video and photos, and is FREE). Now that you have a stitched, playable video, you may need to edit the video down to a smaller length focusing on a selected portion of what was recorded (4-7 min is typically fine). There are several free 360 video editors for this. We have used Virb, and it does a nice basic job. If you want something nicer, you will need to pay for it. Finally, you need a way to share the video. There are a few options here that tend to work well: Vimeo, YouTube, and Kaltura. Each of these players allows for a viewer to watch the 360 video on any screened device and even has an option for “VR Mode” which allows you to place your phone into headset (Google Cardboard or similar).
The overview provided above provides enough detail to help most tech savy individuals create their own 360 videos. In addition to the process above, there are a few details worth a beginning 360 videographer’s time. For example, the equipment you use matters quite a bit. There is no shortage of blog posts and technical reviews regarding 360 cameras. However, we’ve found that while the video quality of certain cameras can be good, or good for the cost, working with the video files after recording can be a chore. When we began using 360 cameras, we tried several (Yi 360, Samsung Gear 360, Ricoh Theta SC, and Ricoh Theta V). The Yi 360 is cheap, provides great quality video, and gives you dozens of files for a 25 minute session. It is a good camera, but is a pain to work with once you have the video. Additionally, unless you have a higher functioning computer, you will have difficulty with the 5.7K video. The Samsung Gear 360 is also a cheaper option and says it produces 4K (not really, but it isn’t horrible quality). The videos take a long time to stitch – much longer than some other cameras to the point you should leave your computer running over night. By comparison, the Ricoh Theta V provides 4K 360 video and is the most user friendly 360 camera we have tried. The camera is limited to 25 minutes before needing to restart recording, but provides a single video file that you drag-and-drop onto your computer, and then into the stitching program. After the stitching program has finished, you can upload it to YouTube (or edit it before uploading). There may be a better camera which is similarly as user friendly as the Ricoh brand, but we haven’t had the opportunity to try it out yet.
In addition to finding a good camera, we have found getting a selfie stick with a small tripod at the base to be useful in placing the 360 camera wherever we need to put it, and make it less noticeable in the video itself. One thing we have learned is that these selfie sticks are easy to knock over. So, you may want to put a few bean bags (or gallon baggies with rice in them) at the base to keep them from getting knocked over from a tap.